Eskimo Pie Popsicle is the best homemade recipe for those who want to bring back the joy of childhood or simply for those who love to cook desserts from scratch. This recipe is so good that it offers the right balance of slight softness and crispy crunch. Such refreshing and delicious ice cream popsicles can be prepared quickly and will be ideal on a hot summer day or as a dessert served at the end of dinner.
What is the Eskimo Pie Popsicle Recipe?
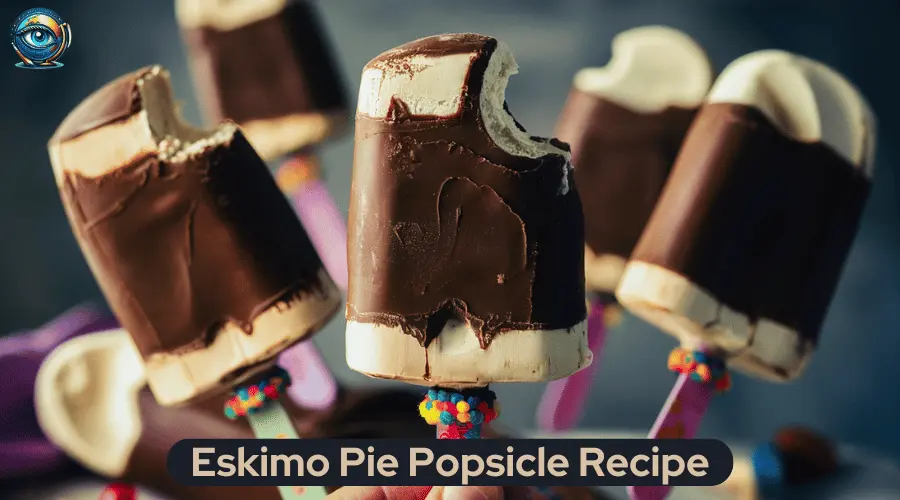
Eskimo Pie popsicles are an old-fashioned frozen dessert that fuses vanilla ice cream with a hard chocolate shell. First made in the early 1900s, they are one of the earliest mass-produced ice cream-based bars, and they are a favorite dessert to many to this day. Making Eskimo Pie popsicles at home gives you a chance to experience the same treat and add something new to it as well. This recipe has lots of benefits, if it is made with certain safety and precautions.
Apart from the fact that you get to choose the quality of each ingredient used in the making, this recipe also allows you to play around with flavors and toppings as you desire. Names such as vanilla and milk chocolate should not intimidate any imagination since there are more daring options to incorporate. Let’s get started on the process of preparing these Eskimo Pie popsicles, and eat a page of history with every bite!
Step-by-Step Process to Make the Best Homemade Eskimo Pie Popsicle Recipe
Ingredients:
- 2 cups of vanilla ice cream (softened slightly)
- 1 cup of milk chocolate chips
- 2 tablespoons of coconut oil (optional, helps in smooth melting of chocolate)
- Popsicle molds
- Popsicle sticks
Instructions:
Step 1. Prepare the Ice Cream Layer:
A. Start with softened vanilla ice cream and rhythmically bring scoops into your popsicle molds. Tap the molds against the counter with moderate pressure to break any air bubble packs, and to level off the ice cream.
B. Insert the popsicle sticks into molds.
C. Place the molds into the fridge for a minimum of 4-6 hours or until they are completely frozen.
Step 2. Prepare the Chocolate Coating:
A. Take a microwave-safe bowl; add milk chocolate chips and coconut oil.
B. Put this in the microwave oven in 20-second increments and mix in between until you have a nice smooth melted chocolate. You can also use a double boiler to melt the chocolate if you wish to.
C. Let the temperature of the chocolate mixture drop slightly. But not so much that it becomes hardened.
Step 3. Coat the Ice Cream:
A. Remove the popsicles from the molds when the ice cream is frozen solid.
B. Using one hand, dip the popsicle into the melted chocolate and keep turning the popsicle so that you do not have uneven deposits of chocolate in one area. The ice cream is very cold so the chocolate will harden almost immediately after coming into contact with the ice cream.
C. It is advisable to hold the popsicle vertically over a parchment paper-covered tray to prevent drippings from soiling in the working area.
Step 4. Freeze Again:
Place the dipped ice cream on a tray covered with parchment paper and put it back into the freezers for another 15 to 20 minutes to enable the chocolate coating to harden completely.
Step 5. Serve and Enjoy:
As soon as the chocolate set, your homemade Eskimo Pie popsicle recipe is ready to serve. you can also store any extras in an airtight container in the freezer.

Tips to Follow:
If you want your chocolate coats to be thicker, you can double dip the popsicle making sure the intermediate freezing’s a few minutes in the blender.
If you want to add more taste and flavor then chopped nuts, sprinkles, or coconut flakes to the chocolate coating are good choices.
Now go enjoy your best homemade Eskimo Pie Popsicle recipe!
FAQs
Yes, of course! While the classic version of Eskimo Pie Popsicles uses plain vanilla ice cream, you are free to try out all different ice cream flavors, including chocolate, strawberry, mint, or possibly even three different flavors at once. This means you can change the popsicles to your liking.
If you seek to spice things up then you may use dark/white/semi-sweet chocolate for the outer cheese layer. Also, toppers like crushed nuts, coconut, or even sprinkles can be added to the melted chocolate to enhance the taste of the popsicles.
To avoid melting too quickly, make sure that the popsicles are fully firm and set in place before the rolling of the melted chocolate takes place. Avoid delays when rolling the popsicles in melted chocolate, and if possible, place the coated popsicles back in a freezer so that the outer coating hardens almost immediately after aplicación.
Yes, you can! If you don’t have foam, there are substitutes like small paper cups or even silicone molds. To do this, fill these cups with ice cream and use the aluminum foil to seal the cup; insert the ice cream stick in the middle and freeze in this way.
Axes homemade Eskimo Pie popsicles can be kept in the freezer in an airtight container for about 2 weeks. Sticking out should be with a paper liner to avoid them forming one better stuck in a container. To have the best flavor and texture, it is advisable to consume them within that period.


